Post — Tips and Tricks
August 2021
HDR photography: a beginner’s guide
Post — Tips and Tricks
August 2021
HDR photography: a beginner’s guide
Have you ever captured a stunning scene and realizing afterwards that the camera did not actually capture what you were seeing?
You want to portray the full tonal range of that scene. Yet, with only one shot and one exposure, you can either keep the highlight at the expenses of the shadows or show the shadow’s details and sacrifice the bright areas of your scene.
That is when HDR photography comes into play.
What is HDR?
HDR stands for High Dynamic Range. HDR is used in photography to capture the full range of tonal values within a high contrasted scene. In other words, thanks to HDR, scenes with high contrast in brightness can be properly exposed.
What is HDR?
HDR stands for High Dynamic Range.
HDR is used in photography to capture the full range of tonal values within a high contrasted scene. In other words, thanks to HDR, scenes with high contrast in brightness can be properly exposed.
Why use HDR?
Camera sensors just can’t capture the amount of dynamic light that a human eye can see. If you are struggling to get a good exposure, if the shadows appear too dark or the highlights are too bright, that means your scene has a high dynamic range. In that case you should use HDR. By doing so, you won’t have to pick between your subjects in the darker aeras or your details in the highlights. Your resulting photograph will have greater details, richer colours as well as less noise.
How to make HDR photographs (traditionally)?
The traditional method to make HDR photographs is called Bracketing. Bracketing is a digital technique whereby multiple exposures of the same scene are captured.
Once you have decided upon the scene you want to photograph, there are a couple of things you need to bear in mind.
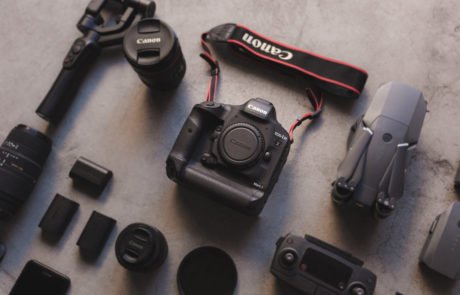
Using the right equipment
- A camera
- A tripod: Your camera must be secured throughout the shot to avoid any vibration or movement that would alter the sharpness of your photograph.
- A shutter release: for that same reason, we recommend using a wireless shutter release to be in a hands-off approach. Don’t worry if you don’t have one, you can use the timer facility on your camera.
- A dedicated piece of HDR software
Setting your camera
- As a rule of thumb, everything on your camera should be locked off apart from your shutter speed. With very few exceptions, you would want to keep the lens aperture and the ISO settings fixed, changing the shutter speed from one frame to the next. When photographing still life scenes, chances are that you want to have a lot of things in focus so go for F8 / F11 aperture. Make sure you are at low ISO (100 / 200) to reduce grain and noise.
- So that nothing moves during the shot, switch to manual focus.
Capturing the bracketed sequence
You can then set up a series of bracketed shot. Most cameras these days support bracketing. The process involves configuring the bracket settings and using a well-timed shutter release so that all the photos in the bracketed sequence will be captured as quickly as possible. We recommend a series of either 3, 5 or 7 exposures to capture the range. You generally want to have a middle shot (“correct exposure”), 1 below and 1 above, or 2 below and 2 above, or 3 below and 3 above to keep the balance even and capture the highlights and shadows details.
Merging the images
Once you have captured your bracketed sequence, you are ready to process it to create the final HDR result. To do so, you can use a dedicated piece of HDR software to merge your images and apply a variety of tone mapping options.
How to make HDR photographs (traditionally)?
The traditional method to make HDR photographs is called Bracketing. Bracketing is a digital technique whereby multiple exposures of the same scene are captured.
Once you have decided upon the scene you want to photograph, there are a couple of things you need to bear in mind.
Using the right equipment
- A camera
- A tripod: Your camera must be secured throughout the shot to avoid any vibration or movement that would alter the sharpness of your photograph.
- A shutter release: for that same reason, we recommend using a wireless shutter release to be in a hands-off approach. Don’t worry if you don’t have one, you can use the timer facility on your camera.
- A dedicated piece of HDR software
Setting your camera
- As a rule of thumb, everything on your camera should be locked off apart from your shutter speed. With very few exceptions, you would want to keep the lens aperture and the ISO settings fixed, changing the shutter speed from one frame to the next. When photographing still life scenes, chances are that you want to have a lot of things in focus so go for F8 / F11 aperture. Make sure you are at low ISO (100 / 200) to reduce grain and noise.
- So that nothing moves during the shot, switch to manual focus.
Capturing the bracketed sequence
You can then set up a series of bracketed shot. Most cameras these days support bracketing. The process involves configuring the bracket settings and using a well-timed shutter release so that all the photos in the bracketed sequence will be captured as quickly as possible. We recommend a series of either 3, 5 or 7 exposures to capture the range. You generally want to have a middle shot (“correct exposure”), 1 below and 1 above, or 2 below and 2 above, or 3 below and 3 above to keep the balance even and capture the highlights and shadows details.
Merging the images
Once you have captured your bracketed sequence, you are ready to process it to create the final HDR result. To do so, you can use a dedicated piece of HDR software to merge your images and apply a variety of tone mapping options.
B
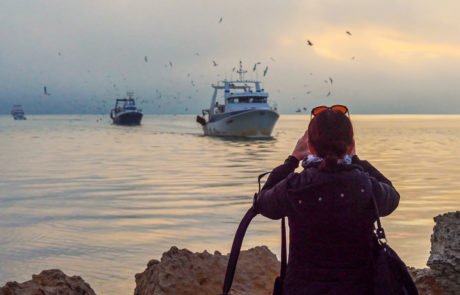
What if you shoot moving subjects in difficult light conditions? Let’s say your kids running on a beach at the golden hour. You do want to capture all details in both shadows and highlights of your scene, right? But how can you do that if bracketed sequences just don’t work with moving subjects?
B
What if you shoot moving subjects in difficult light conditions? Let’s say your kids running on a beach at the golden hour. You do want to capture all details in both shadows and highlights of your scene, right? But how can you do that if bracketed sequences just don’t work with moving subjects?
HDRinstant: creating HDR photographs of moving subjects
Instead of using bracketed shot, HDRinstant creates long exposures by stacking multiples frames from a video or burst images. To enhance a frame, it analyzes and captures all necessary information from the neighboring frames. HDRinstant thus overcomes the constraints of bracketing and allows the creation of HDR photographs with moving subjects, thanks to the use of video.
In just a few clicks, you can create a stunning photograph, with a balance exposure, great details in both shadows and highlights and less noise.

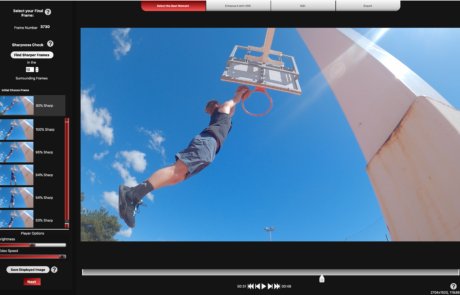
How does HDRinstant work?
1 – Film your moving subject, having in mind the photograph you want to produce.
2 – Upload your video onto HDRinstant
3 – Pick the best moment of the video, the one you want to make a stunning photograph of. Thanks to the use of the video, you will never miss a decisive moment again.
4 – On top of that, HDRinstant helps you finding the right motion effect for your subject. Select “Sharp” if you want to freeze the motion or “Blurry” if you want to apply an esthetical blur.
5 – Click on Process and let HDRinstant does its magic!
6 – Edit your final result with HDRinstant tone-mapping and preset options (if you are using the standalone version), or with Lightroom (if you are using the plugin).
HDRinstant: creating HDR photographs of moving subjects
Instead of using bracketed shot, HDRinstant creates long exposures by stacking multiples frames from a video or burst images. To enhance a frame, it analyzes and captures all necessary information from the neighboring frames. HDRinstant thus overcomes the constraints of bracketing and allows the creation of HDR photographs with moving subjects, thanks to the use of video.
In just a few clicks, you can create a stunning photograph, with a balance exposure, great details in both shadows and highlights and less noise.
How does HDRinstant work?
1 – Film your moving subject, having in mind the photograph you want to produce.
2 – Upload your video onto HDRinstant
3 – Pick the best moment of the video, the one you want to make a stunning photograph of. Thanks to the use of the video, you will never miss a decisive moment again.
4 – On top of that, HDRinstant helps you finding the right motion effect for your subject. Select “Sharp” if you want to freeze the motion or “Blurry” if you want to apply an esthetical blur.
5 – Click on Process and let HDRinstant does its magic!
6 – Edit your final result with HDRinstant tone-mapping and preset options (if you are using the standalone version), or with Lightroom (if you are using the plugin).
Browse our Blog