Blog Post — Tips and Tricks
May 2021
Long exposure photography made easy
Blog Post — Tips and Tricks
May 2021
Long exposure photography made easy
As the name suggests, a long exposure in photography is an image obtained thanks to a sufficiently long exposure time, e.g shutter speed. But why would you do a long exposure? Well, one of the reasons is purely technical. When there is not enough light, you have to increase the exposure time. Another reason is practical: a long exposure can remove moving elements from a shot, for instance passers-by from an urban area.
In this article, we will look at long exposure as an artistic approach. This latter consists in capturing with precision and sharpness the static elements of a scene while applying an aesthetic blur to the moving subjects. The long exposure is particularly used in landscape photography because seas, rivers, clouds and stars are perfect subjects for it. Long exposure can give photographs an aesthetic twist, and, unlike a conventional shot, long exposure allows you to capture a longer period of time.

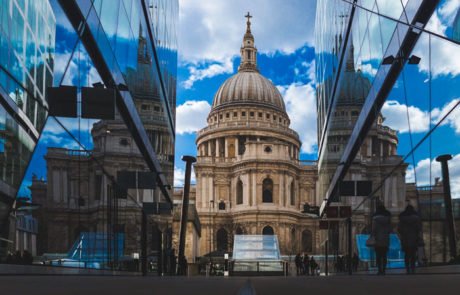
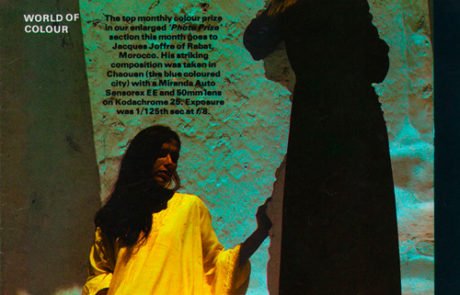
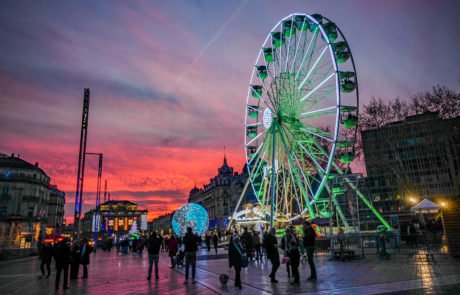
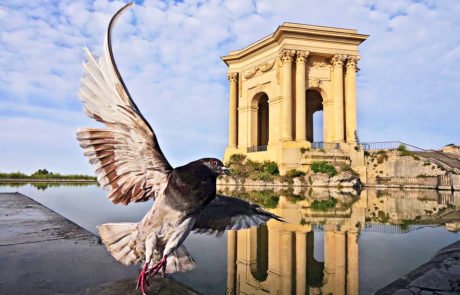
Long exposure photography, Place de la Comédie, Montpellier, Jacques Joffre
As the name suggests, a long exposure in photography is an image obtained thanks to a sufficiently long exposure time, e.g shutter speed. But why would you do a long exposure in photography? Well, one of the reasons is purely technical. When there is not enough light, you have to increase the exposure time. Another reason is practical: a long exposure can remove moving elements from a shot, for instance passers-by from an urban area.
In this article, we will look at long exposure as an artistic approach.This latter consists in capturing with precision and sharpness the static elements of a scene while applying an aesthetic blur to the moving subjects. The long exposure is particularly used in landscape photography because seas, rivers, clouds and stars are perfect subjects for it. Long exposure can give photographs an aesthetic twist, and, unlike a conventional shot, long exposure allows you to capture a longer period of time.
Long exposure photography, Place de la Comédie, Montpellier, Jacques Joffre
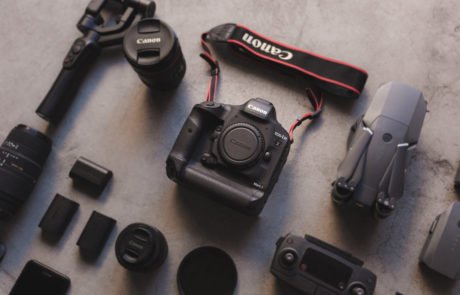
Which gear do I need to do a long exposure in photography?
- A tripod. To create long exposure, you will need a slow shutter speed. And if you don’t want to end up with blurred photographs, you need a tripod to stabilise your image.
- An extra battery. Long exposure consumes more energy than a conventional shot. We recommend you charging your battery beforehand and bringing an extra battery too, just to be on the safe side.
- A remote control or a self-timer. Even if you use a tripod, pressing the shutter button causes vibrations, which will alter the sharpness of your photograph. We advise you to use a remote control, or if you don’t have any, the self-timer of your camera.
- A neutral density filter (ND filter). An ND filter is a key accessory to have for long exposures in bright light. The ND filter is a photo filter, placed in front of the lens, that reduces the amount of light without affecting the final photograph’s colorimetry. You will have to choose the density of your ND filter, depending on the effects you want to achieve. Then, you will just have to measure the speed given by the camera without the filter and adjust this speed according to the density of your ND filter.
- If you use an ND filter, think of bringing a calculator or an app along to calculate the exposure time needed for the photo.
Which gear do I need to do a long exposure?
- A tripod. To create long exposure, you will need a slow shutter speed. And if you don’t want to end up with blurred photographs, you need a tripod to stabilise your image.
- An extra battery. Long exposure consumes more energy than a conventional shot. We recommend you charging your battery beforehand and bringing an extra battery too, just to be on the safe side.
- A remote control or a self-timer. Even if you use a tripod, pressing the shutter button causes vibrations, which will alter the sharpness of your photograph. We advise you to use a remote control, or if you don’t have any, the self-timer of your camera.
- A neutral density filter (ND filter). An ND filter is a key accessory to have for long exposures in bright light. The ND filter is a photo filter, placed in front of the lens, that reduces the amount of light without affecting the final photograph’s colorimetry. You will have to choose the density of your ND filter, depending on the effects you want to achieve. Then, you will just have to measure the speed given by the camera without the filter and adjust this speed according to the density of your ND filter.
- If you use an ND filter, think of bringing a calculator or an app along to calculate the exposure time needed for the photo.
How to make a long exposure in photography?
Comment réaliser une pose longue en photographie ?
Adjusting the shooting parameters
In order to achieve a long exposure, you can set a few parameters, that you would have to adjust according to the light conditions.
- A low ISO sensitivity
The higher the ISO sensitivity, the more sensitive the sensor will be to light. Unlike a normal shot, for which you would increase the ISO as soon as the light is lacking, a long exposure requires a low ISO (50 or 100 ISO, sometimes 200 ISO)
- A small aperture
The aperture determines the amount of light it lets in. A large aperture lets more light into your camera but decreases the depth of field. A small aperture lets in less light but increases the depth of field. For a long exposure, you should use the smallest aperture possible. Because less light reaches the sensor, the camera compensates by using a longer exposure time. However, bear in mind that this option only works in low-light conditions.
- Exposure for highlights
When using a long exposure, it is not easy to determine the right exposure. An exposure time that is too short can result in an underexposed image or a blurry effect that is not pronounced enough. On the other hand, a too long exposure time can result in an overexposed image and burned-out highlights. Keep in mind that it is better to expose for highlights as it is possible to recover more information in dark areas than in burned-out highlights.
Shooting in RAW
In order to obtain the highest image quality and to guarantee post-processing possibilities, we recommend you to shoot in RAW format. This format allows you to recover more detail and information in the shadows than the compressed JPEG format. Also, you will have more leeway to correct the white balance, which can, with some ND filters, pull towards magenta or blue.
Post-processing
It is likely that you would have to edit your final long-exposed photograph. There are three main reasons for it :
- The noise. Given the shooting parameters for a long exposure, it is likely that you end up with a slightly noisy photograph.
- Stains. A photograph taken in long exposure may have stains. These are actually dust on your sensor, which appear when closing the aperture.
- Tinting. Depending on the type of ND filter used, it is possible that a slight colouring appears on your photograph.
You can correct these in post-processing, with tools such as Lightroom or Photoshop.
As you can see, creating long exposure is no easy task. Not only does it requires time and patience, but it also requires a good understanding of photography exposure as well as the right equipment. But don’t worry, we have your back!

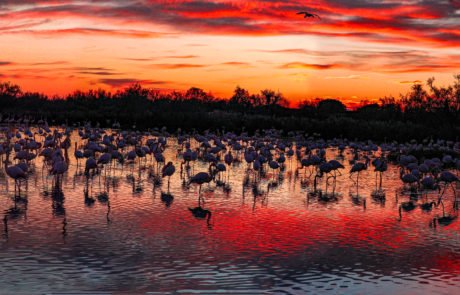
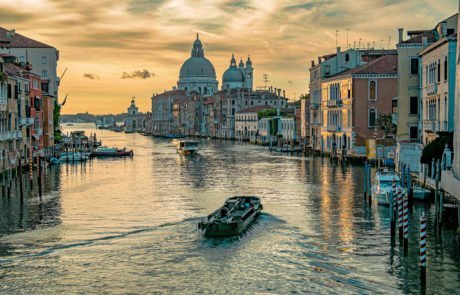
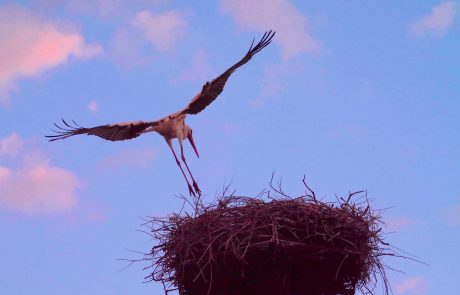
Photography processed with HDRinstant, Montpellier, Jacques Joffre
As you can see, creating long exposure is no easy task. Not only does it requires time and patience, but it also requires a good understanding of photography exposure as well as the right equipment. But don’t worry, we have your back!
Photography processed with HDRinstant, Montpellier, Jacques Joffre
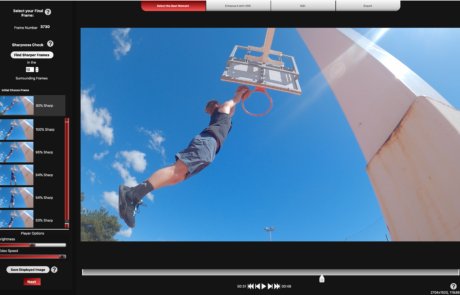
Simulate a long exposure with HDRinstant
Our technology creates long exposures by stacking multiple images from a video sequence. You won’t have to worry about how to set your ISO, how to keep your image still or which gear you should bring along. With HDRinstant, you can easily apply long exposure effects, in just a few clicks!
1 – You have a scene in mind? Film it following the guidelines detailed here.
2 – Once you have your video, upload it onto HDRinstant
3 – Pick the best moment, the one you want to make a photograph of
4 – Define your processing settings, and from the menu “Processing of Moving Subjects” select the option “Blurry (Long Exposure Simulation)
5 – Click on Compute and let HDRinstant does its magic!
6 – Edit your final image using our tone-mapping presets (if you are using the standalone version), or on Lightroom (if you are using the plugin).
Test drive HDRinstant!
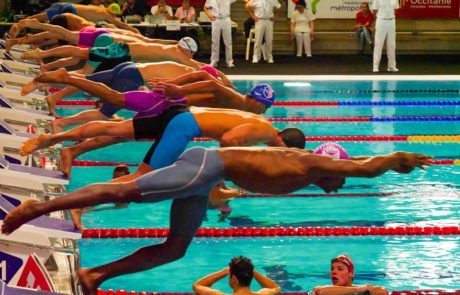
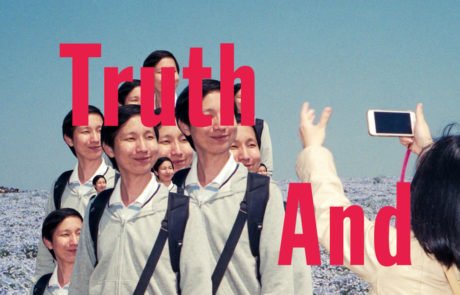
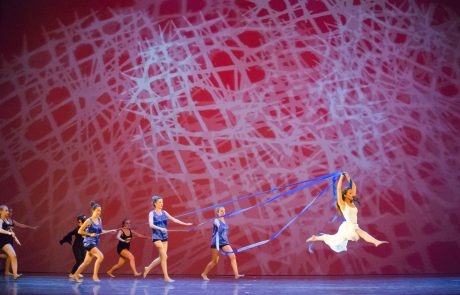
Photography processed with HDRinstant, from a video, Nicolas Tauzin
Simulate a long exposure with HDRinstant
Our technology creates long exposures by stacking multiple images from a video sequence. You won’t have to worry about how to set your ISO, how to keep your image still or which gear you should bring along. With HDRinstant, you can easily apply long exposure effects, in just a few clicks!
1 – You have a scene in mind? Film it following the guidelines detailed here.
2 – Once you have your video, upload it onto HDRinstant
3 – Pick the best moment, the one you want to make a photograph of
4 – Define your processing settings, and from the menu “Processing of Moving Subjects” select the option “Blurry (Long Exposure Simulation)
5 – Click on Compute and let HDRinstant does its magic!
6 – Edit your final image using our tone-mapping presets (if you are using the standalone version), or on Lightroom (if you are using the plugin).
Test drive HDRinstant!
Photography processed with HDRinstant, from a video, Nicolas Tauzin
Browse our Blog