Post — Tips and Tricks
July 2021
How to capture movement in photography
Post — Tips and Tricks
July 2021
How to capture movement in photography
French photographer Henri Cartier-Bresson once said “There is a creative fraction of a second when you are taking a picture. Your eye must see a composition or an expression that life itself offers you, and you must know with intuition when to click the camera. That is the moment the photographer is creative. Oop! The Moment! Once you miss it, it is gone forever.”
Some of the best moments in life are in motion, be it your kids running around, your friends dancing at their wedding or wild animals exploring their natural habitat. You don’t want to miss those decisive moments but to do so, you must learn how to capture motion.
In this article, we will go through different techniques to capture motion in photography, as well as potential issues you might face when photographing moving subjects.
Depending on the artistical twist you want to give your photographs, you can either freeze or blur the motion.
Freeze the motion
F
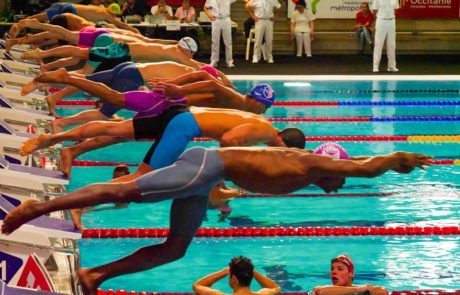
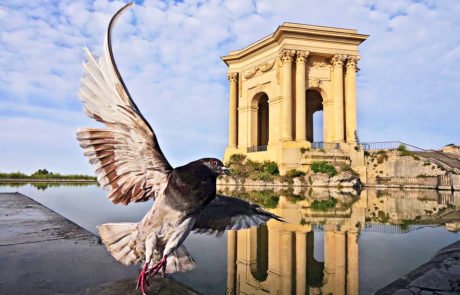
To freeze the movement and produce a sharp photograph, you should use a fast shutter speed. The faster the shutter speed, the more crisply-defined your moving subject will be.
But here comes the tricky part: fast shutter speeds may result in underexposed photographs, as the amount of light that comes into your sensors is limited. You can counter that underexposure by using a high ISO, increasing the aperture, or using a flash. But…here are the trade-offs:
- Using a high ISO can result in a noisy image when shooting in low-light condition. At high ISO the camera’s sensor becomes more responsive to light, but in low-light condition less light is actually hitting the camera. In other words, you signal-to-noise ratio won’t be very good as the probability of a sensor being hit is smaller.
- Increasing the aperture, may can cause your image to be out of focus. The aperture determines how much light the camera’s sensor lets in. A wider aperture lets more light into your camera but shallows the depth of field. In other words, your subject might be frozen, but other elements in your photograph might be out of focus.
- Using the camera’s flash is quite of an easy solution to counter low light. However, most cameras have short range flashes, meaning that you must stand very close to your subject, while you are shooting.

Freeze the motion
F
To freeze the movement and produce a sharp photograph, you should use a fast shutter speed. The faster the shutter speed, the more crisply-defined your moving subject will be.
But here comes the tricky part: fast shutter speeds may result in underexposed photographs, as the amount of light that comes into your sensors is limited. You can counter that underexposure by using a high ISO, increasing the aperture, or using a flash. But…here are the trade-offs:
- Using a high ISO can result in a noisy image when shooting in low-light condition. At high ISO the camera’s sensor becomes more responsive to light, but in low-light condition less light is actually hitting the camera. In other words, you signal-to-noise ratio won’t be very good as the probability of a sensor being hit is smaller.
- Increasing the aperture, may can cause your image to be out of focus. The aperture determines how much light the camera’s sensor lets in. A wider aperture lets more light into your camera but shallows the depth of field. In other words, your subject might be frozen, but other elements in your photograph might be out of focus.
- Using the camera’s flash is quite of an easy solution to counter low light. However, most cameras have short range flashes, meaning that you must stand very close to your subject, while you are shooting.
Blur the motion
Blurs can create dynamic photographs of your moving subjects. If you want to add aesthetic blurred effects on your photographs, you can either blur the subject while having the background in focus or blur the background while having the subject in focus.
Blurred subject with the background in sharp focus
Blurred subject with the background in sharp focus
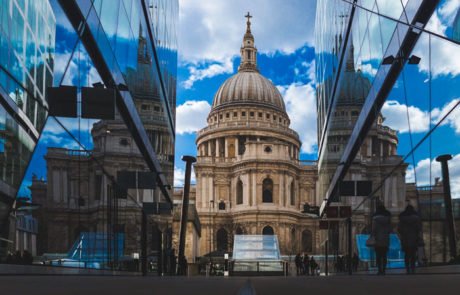
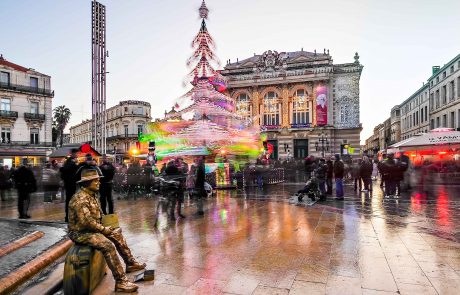
Let’s take an example of a kid running in front of a building. You could blur the kid while leaving the building in focus. To do so, you would use a slow shutter to make a long exposure. To stabilize your image while shooting, you would need a tripod. You can check out our article on long exposure for additional information.
Blurred background with the subject in sharp focus
Blurred background with the subject in sharp focus
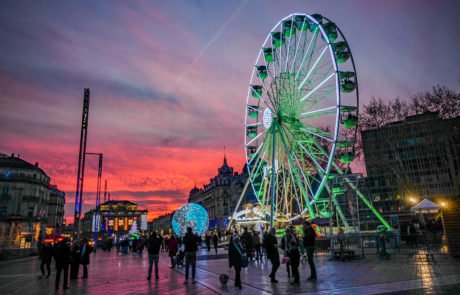
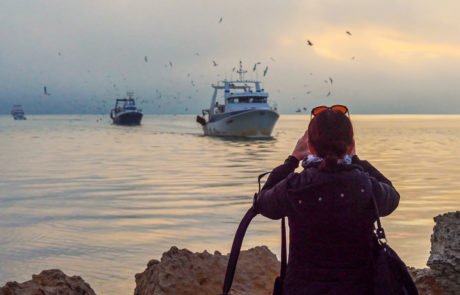
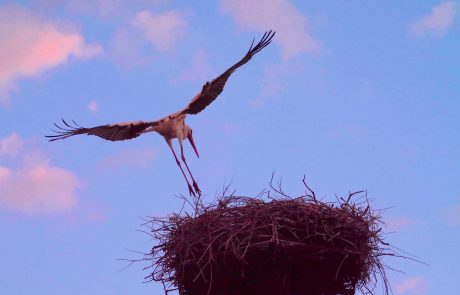
This technique is often used to capture subjects moving in a continuous direction, such as cyclists, motorcyclists, trains, boats, cars etc.
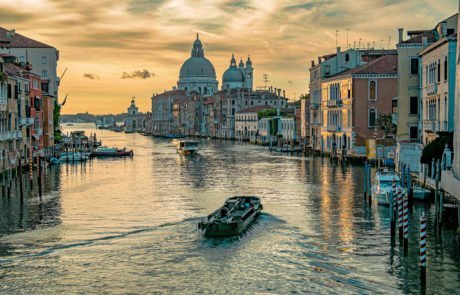
Let’s assume you want to photograph a speeding boat in front of an island. You would keep the boat in focus while blurring the background. Like the first method, you would also use a slow shutter speed. However, instead of using a tripod, you’ll be panning your camera along the directional path of your moving subject. In other words, you would have to move your camera, matching your subject’s speed and trajectory.
Motion blur, in both techniques, requires a longer exposure time, in other words a slower shutter speed. Shutter speed determines how long the camera’s sensor is exposed. While a fast shutter speeds may result in underexposed photographs as it limits the amount of light that comes into the sensor, a slow shutter speed may result in overexposed photographs as it allows more light in. You can use the aperture and the ISO to counter that overexposure:
- Try adjusting the settings to reduce the aperture size. For a long exposure, you should use the smallest aperture possible. Because less light reaches the sensor, the camera compensates by using a longer exposure time. However, bear in mind that this option only works in low-light conditions.
- As mentioned above, the higher the ISO, the more sensitive the camera’s sensor is to light. When capturing motion blur, using a lower ISO with a longer shutter speed will help prevent overexposure.
Blur the motion
Blurs can create dynamic photographs of your moving subjects. If you want to add esthetical blurred effects on your photographs, you can either blur the subject while having the background in focus or blur the background while having the subject in focus.
Blurred subject with the background in sharp focus
Blurred subject with the background in sharp focus
Let’s take an example of a kid running in front of a building. You could blur the kid while leaving the building in focus. To do so, you would use a slow shutter to make a long exposure. To stabilize your image while shooting, you would need a tripod. You can check out our article on long exposure for additional information.
Blurred background with the subject in sharp focus
Blurred background with the subject in sharp focus
This technique is often used to capture subjects moving in a continuous direction, such as cyclists, motorcyclists, trains, boats, cars etc.
Let’s assume you want to photograph a speeding boat in front of an island. You would keep the boat in focus while blurring the background. Like the first method, you would also use a slow shutter speed. However, instead of using a tripod, you’ll be panning your camera along the directional path of your moving subject. In other words, you would have to move your camera, matching your subject’s speed and trajectory.
Motion blur, in both techniques, requires a longer exposure time, in other words a slower shutter speed. Shutter speed determines how long the camera’s sensor is exposed. While a fast shutter speeds may result in underexposed photographs as it limits the amount of light that comes into the sensor, a slow shutter speed may result in overexposed photographs as it allows more light in. You can use the aperture and the ISO to counter that overexposure:
- Try adjusting the settings to reduce the aperture size. For a long exposure, you should use the smallest aperture possible. Because less light reaches the sensor, the camera compensates by using a longer exposure time. However, bear in mind that this option only works in low-light conditions.
- As mentioned above, the higher the ISO, the more sensitive the camera’s sensor is to light. When capturing motion blur, using a lower ISO with a longer shutter speed will help prevent overexposure.
In a nutshell, to capture motion in photography requires finding the right balance between your shutter speed, ISO settings and aperture, taking into consideration both your moving subject – how far the subject is from the camera, how fast it is moving, how wide the movement is etc. – as well as light conditions.
First and foremost, you also need to know, before adjusting your settings, what type of motion you want your photograph to convey. Do you want to freeze the entire scene or do you want to add esthetical blur? Once you have made your decision, there is no turning back. The “moment” only lasts a few seconds.
What if you would have the possibility to experiment both options and decide which one best suits your scene?
What if, in addition to that, you don’t have to worry about your ISO and aperture for a given shutter speed?
I
First and foremost, you also need to know, before adjusting your settings, what type of motion you want your photograph to convey. Do you want to freeze the entire scene or do you want to add esthetical blur? Once you have made your decision, there is no turning back. The “moment” only lasts a few seconds.
What if you would have the possibility to experiment both options and decide which one best suits your scene?
What if, in addition to that, you don’t have to worry about your ISO and aperture for a given shutter speed?
Capture movement with HDRinstant
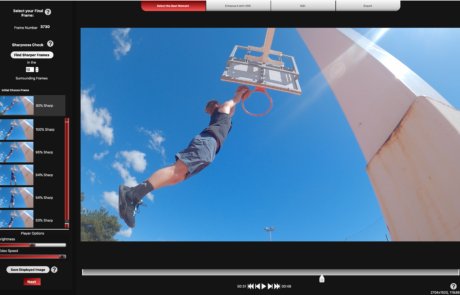
With HDRinstant, you won’t have to decide beforehand which effect you want to apply on your moving subject, neither would you have to find the right ISO or keep your image still. Master your motion in just a few clicks, thanks to the use of a video! How does it work?
1 – You want to photograph a moving subject ? Well, simply film it. You will never miss a decisive moment again and HDRinstant will help you finding the right motion effect.
2 – Once you have your video, upload it onto HDRinstant
3 – Pick the best moment of it, the one you want to make a photograph of
4 – Select which effect you want to give to your moving subject. “Sharp” freezes the entire scene while “Blurry” makes a long exposure simulation.
5 – Click on Process and let HDRinstant does its magic!
6 – Edit your final image using our tone-mapping presets (if you are using the standalone version), or on Lightroom (if you are using the plugin).
Capture movement with HDRinstant
With HDRinstant, you won’t have to decide beforehand which effect you want to apply on your moving subject, neither would you have to find the right ISO or keep your image still. Master your motion in just a few clicks, thanks to the use of a video! How does it work?
1 – You want to photograph a moving subject ? Well, simply film it. You will never miss a decisive moment again and HDRinstant will help you finding the right motion effect.
2 – Once you have your video, upload it onto HDRinstant
3 – Pick the best moment of it, the one you want to make a photograph of
4 – Select which effect you want to give to your moving subject. “Sharp” freezes the entire scene while “Blurry” makes a long exposure simulation.
5 – Click on Process and let HDRinstant does its magic!
6 – Edit your final image using our tone-mapping presets (if you are using the standalone version), or on Lightroom (if you are using the plugin).
Browse our Blog