Learning Material — User Guide
HDRinstant User Guide: Standalone Version
Learning Material — User Guide
HDRinstant User Guide: Standalone Version
HDRinstant standalone version will allow you to capture the best frame of your video, enhance it with HDR and apply tone-mapping options.
If you have not done so yet, download the Standalone version here.
I. Shoot your video
- Resolution
For best results we recommend filming in 4K.
- Shutter speed
The right shutter speed will depend on the speed of your subject’s movement.
If the subject is moving fast, we recommend using a high shutter speed to freeze the movement. For example, when filming dancers jumping in the air, it is better to set your shutter speed at 1/250 of a second.
If the subject is moving slowly, we recommend using lower shutter speed. For example, when shooting passengers, it is better to set your shutter speed at 1/250 of a second.
- Number of FPS – Frames Per Second
The number of FPS will depend on the speed of your subject’s movement. The faster the movement, the higher the number of FPS should be.
If the subject is moving fast, we recommend 60 to 120 FPS.
If the subject is moving slowly, we recommend at least 30 FPS.
- Exposure settings
We recommend working on “Manual” mode, with an exposure compensation of -1, to make sure not to overexpose the highlights of the scene, and the ISO value set automatically. HDRinstant eliminates the noise generated on the image by a high ISO value.
II. Upload your video in HDRinstant
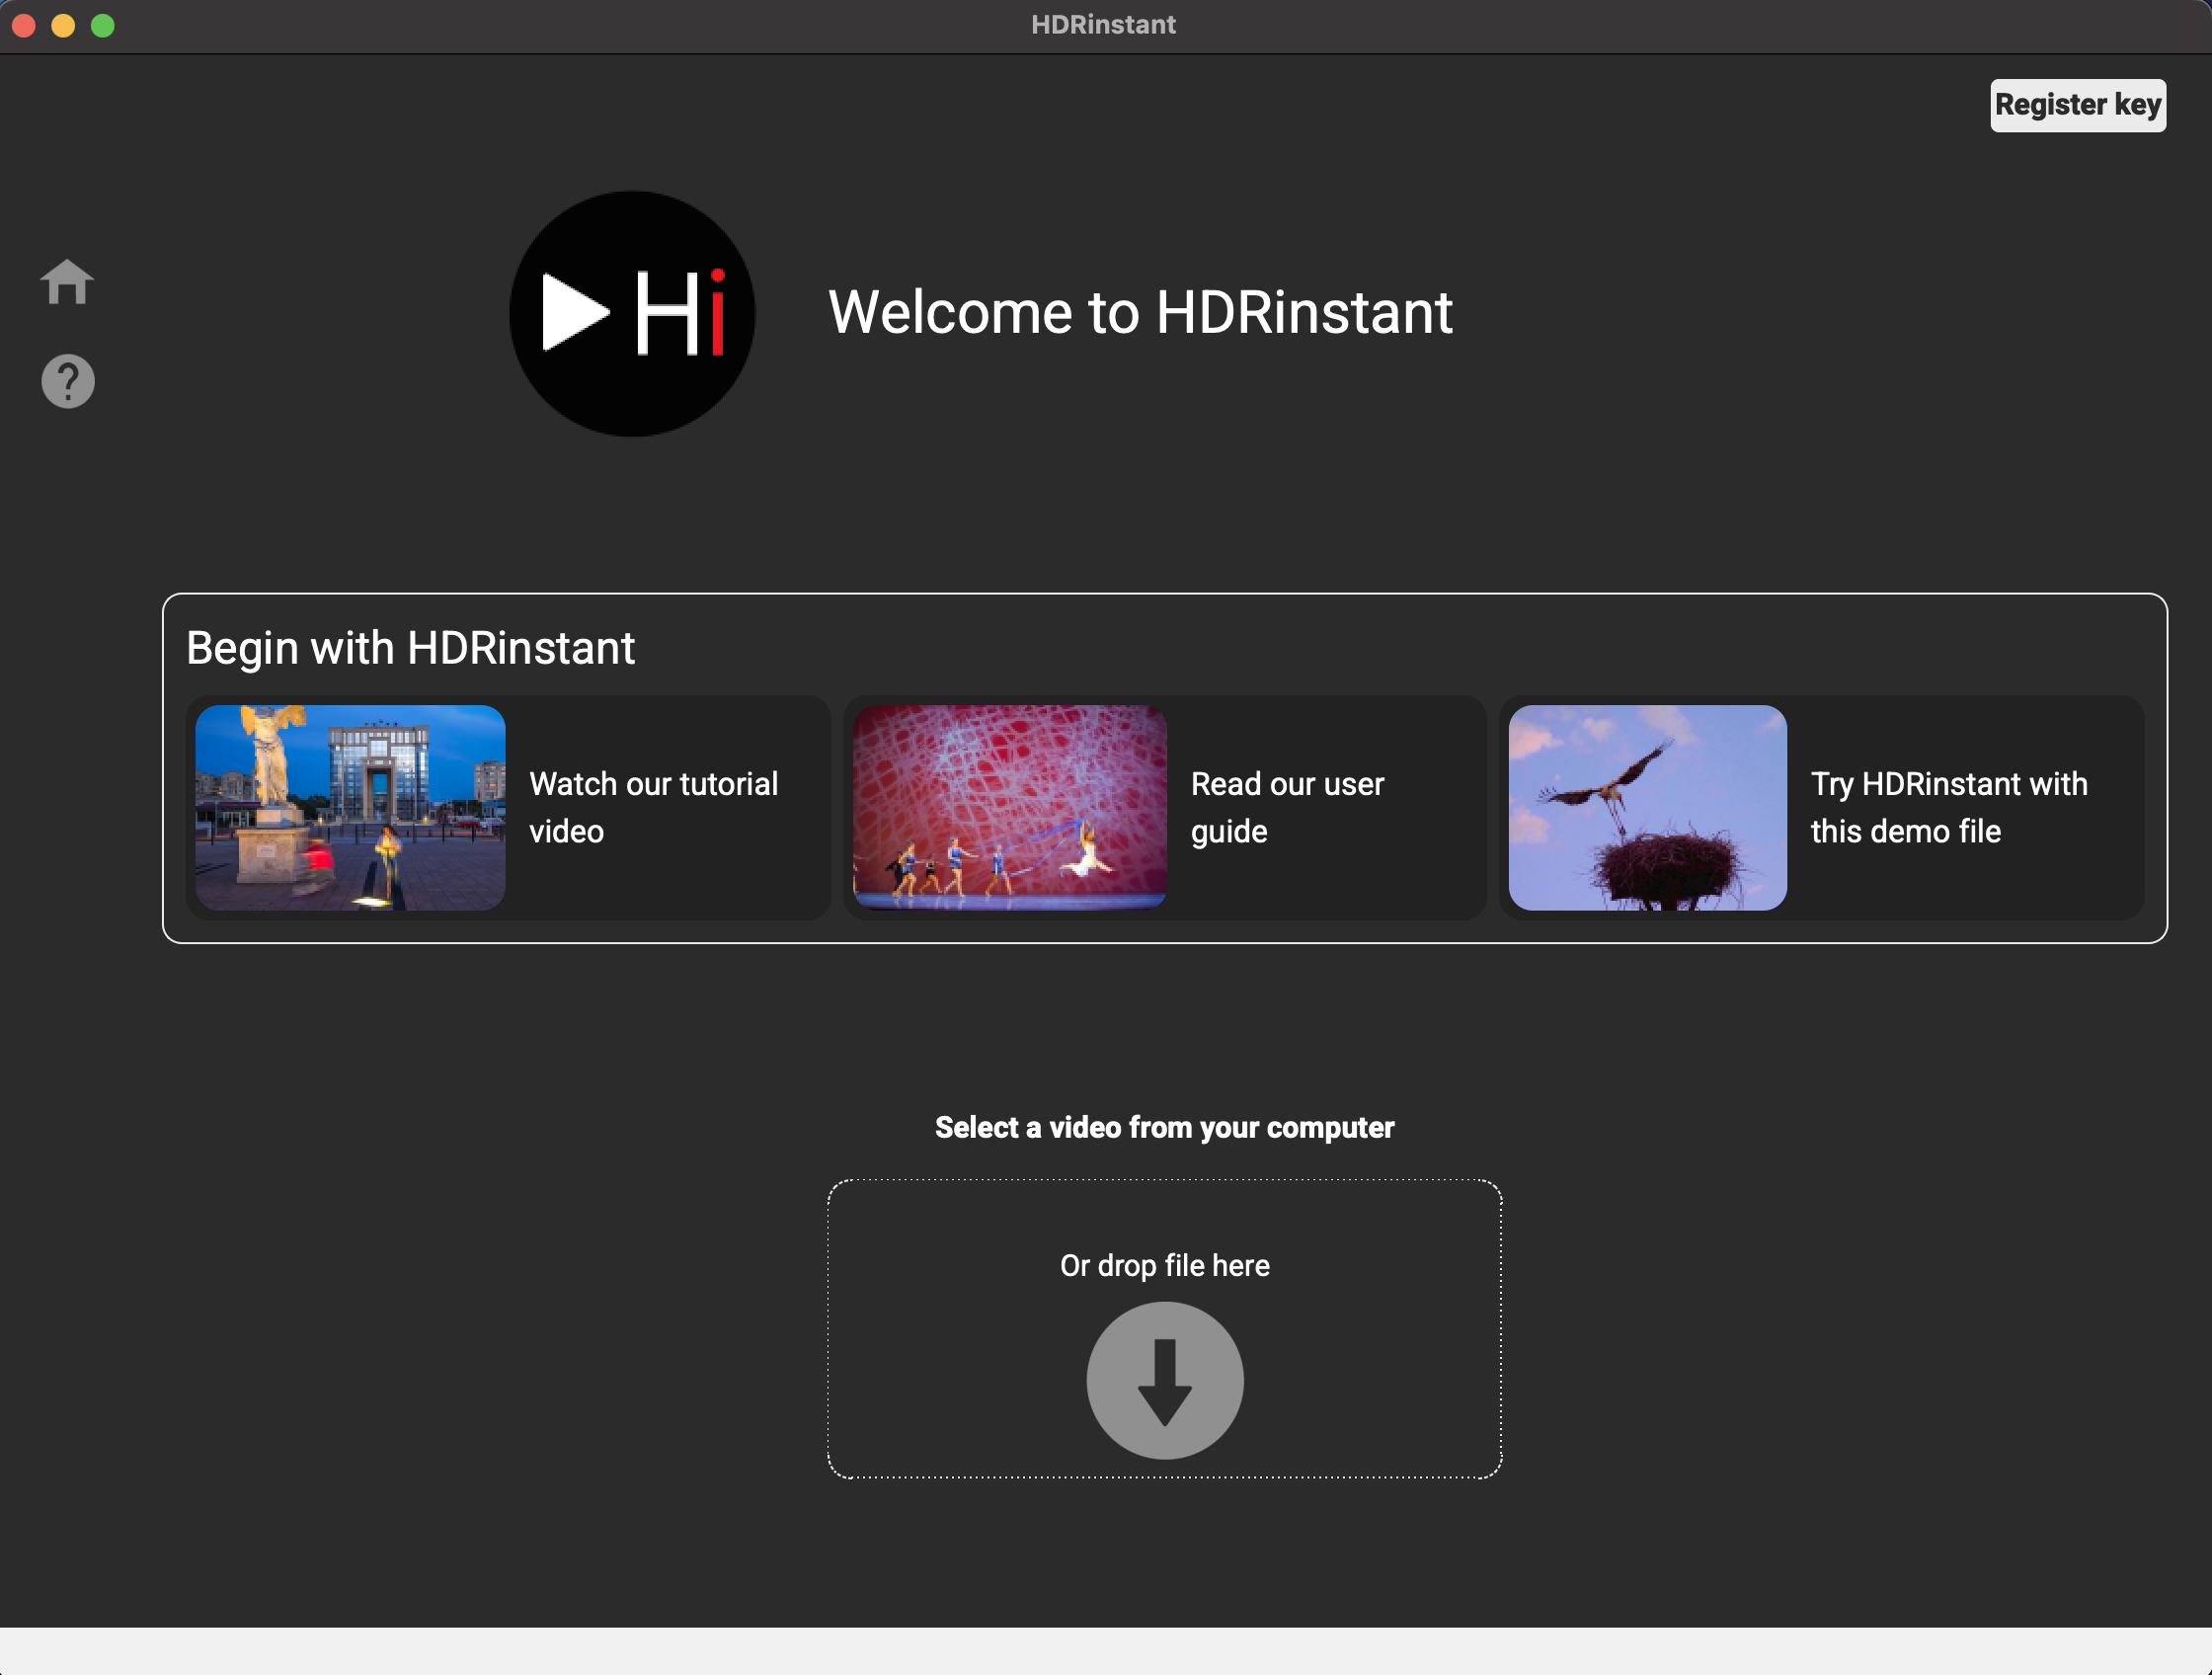
- When first using the software, you are invited to watch a tutorial video, read our user guide on our Website or try the software using a demo video.
- To open your own file, click on Select a video from your computer or drag and drop your video.
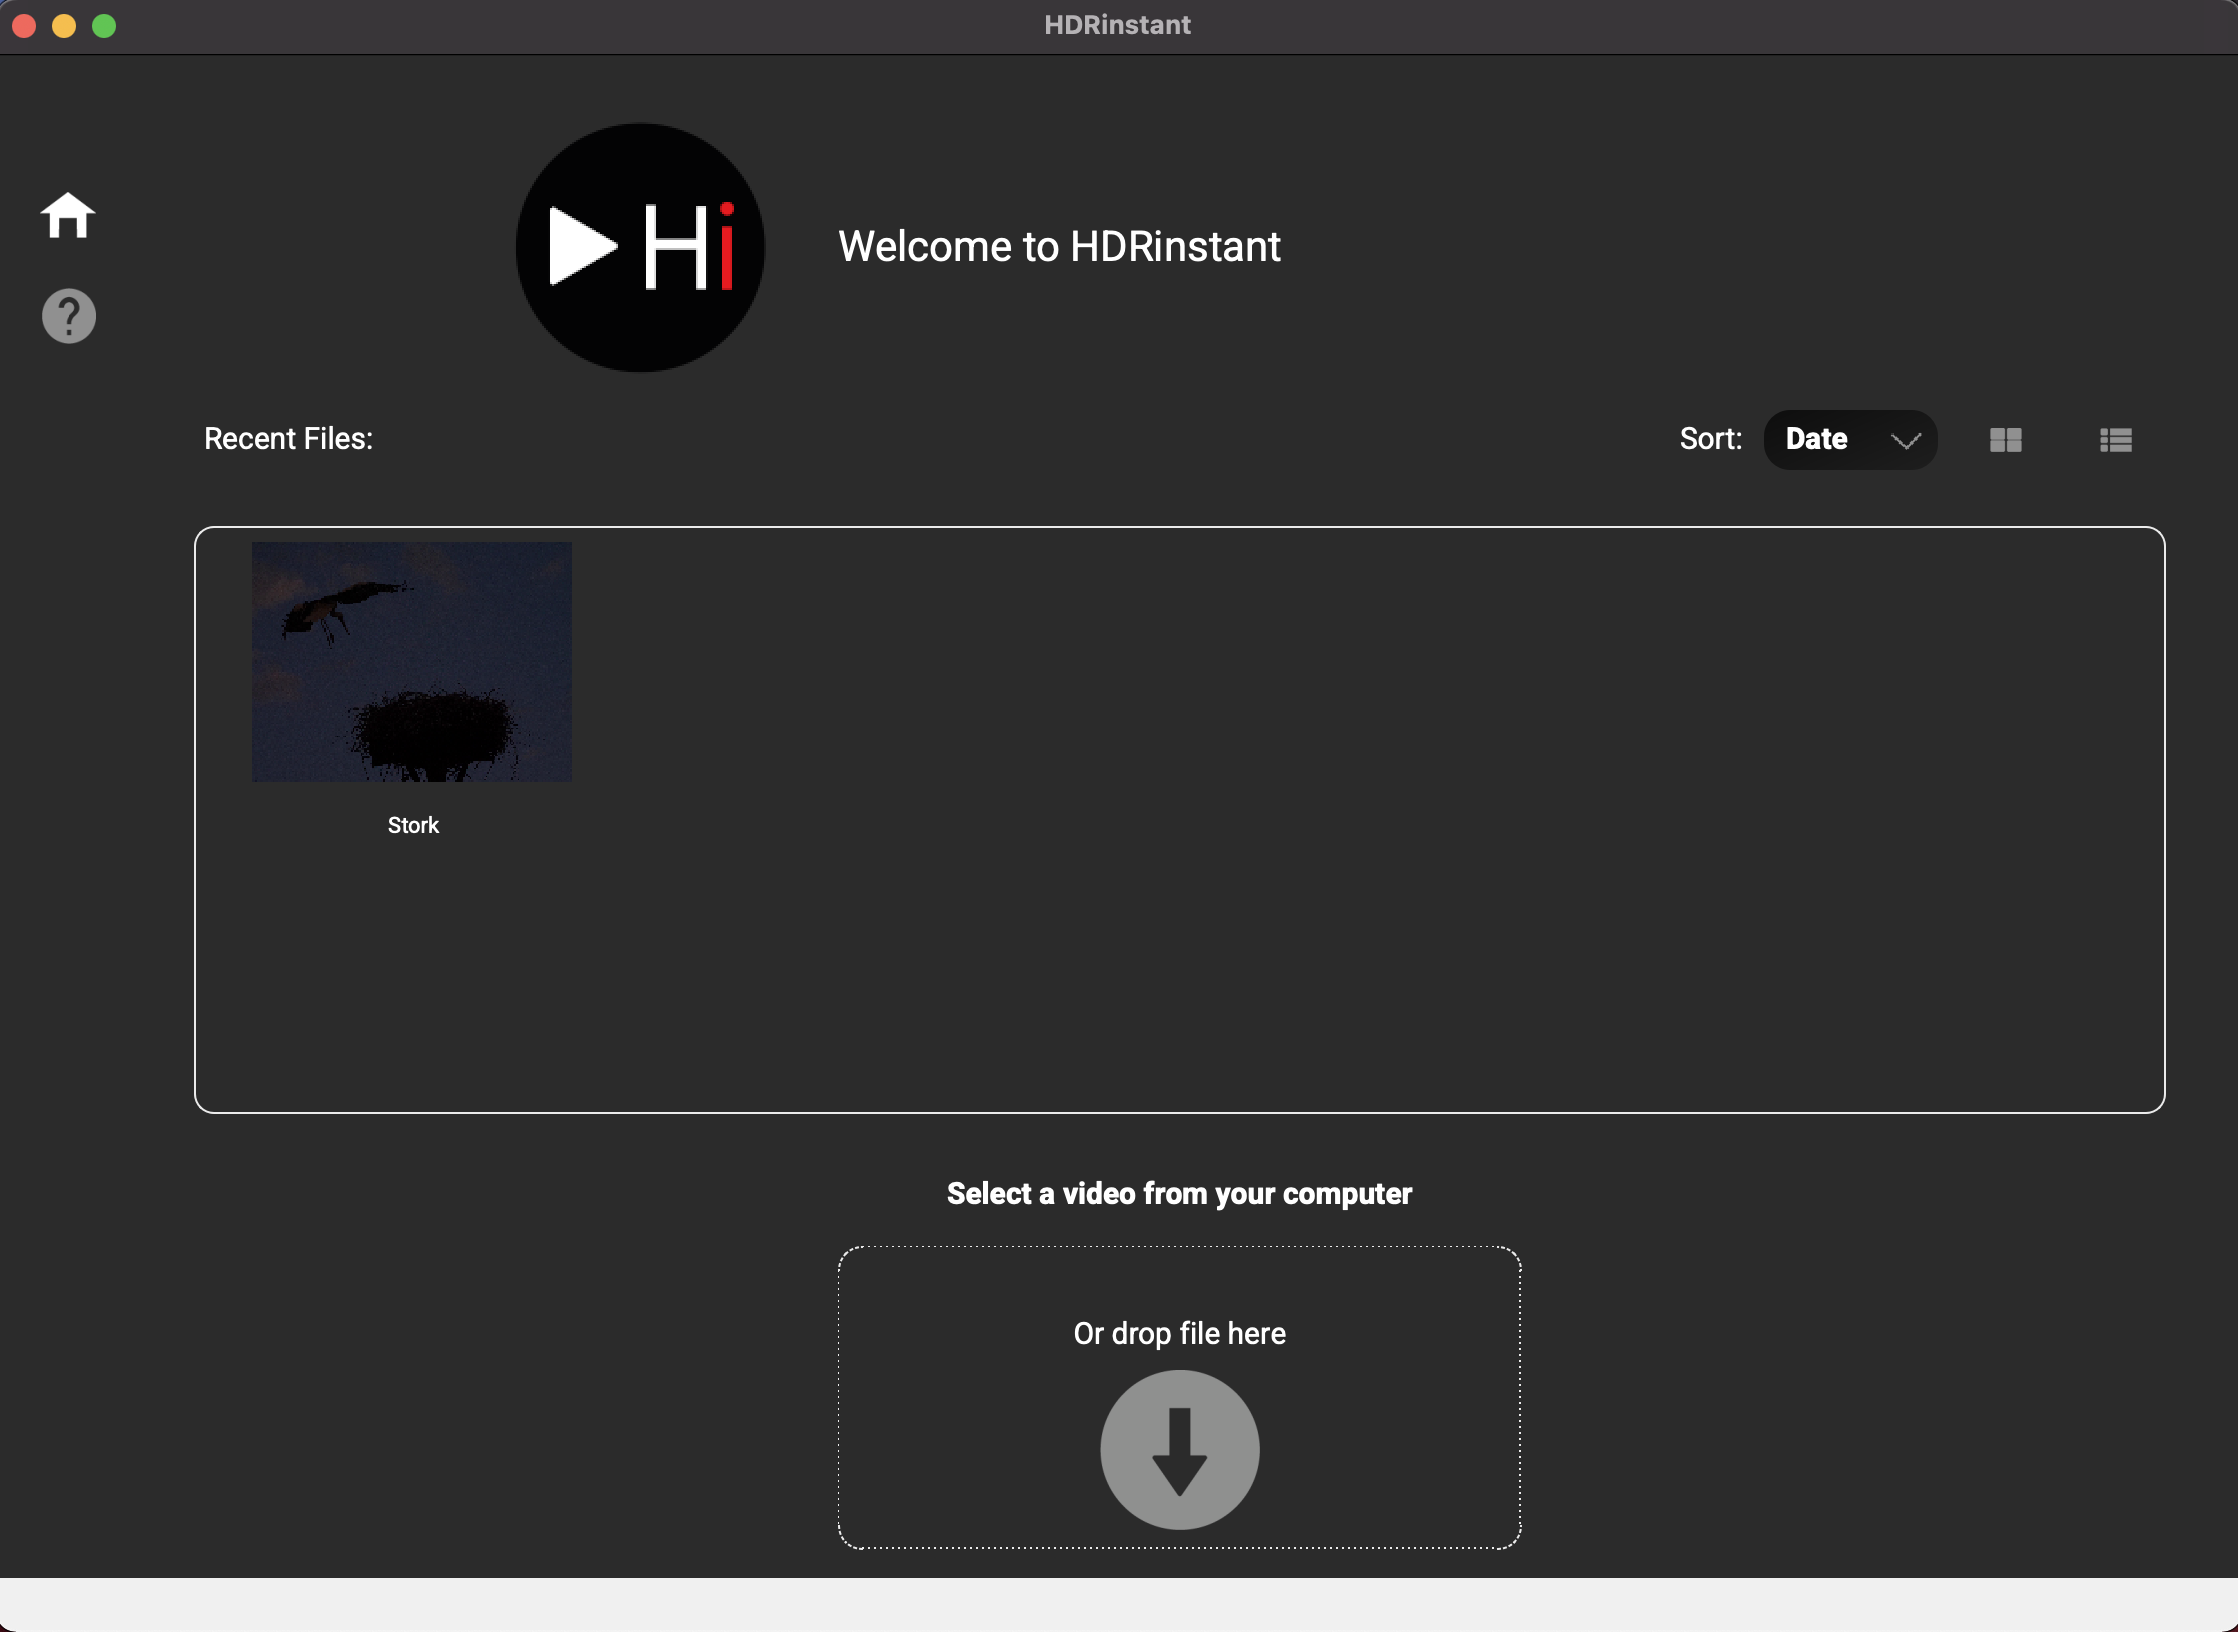
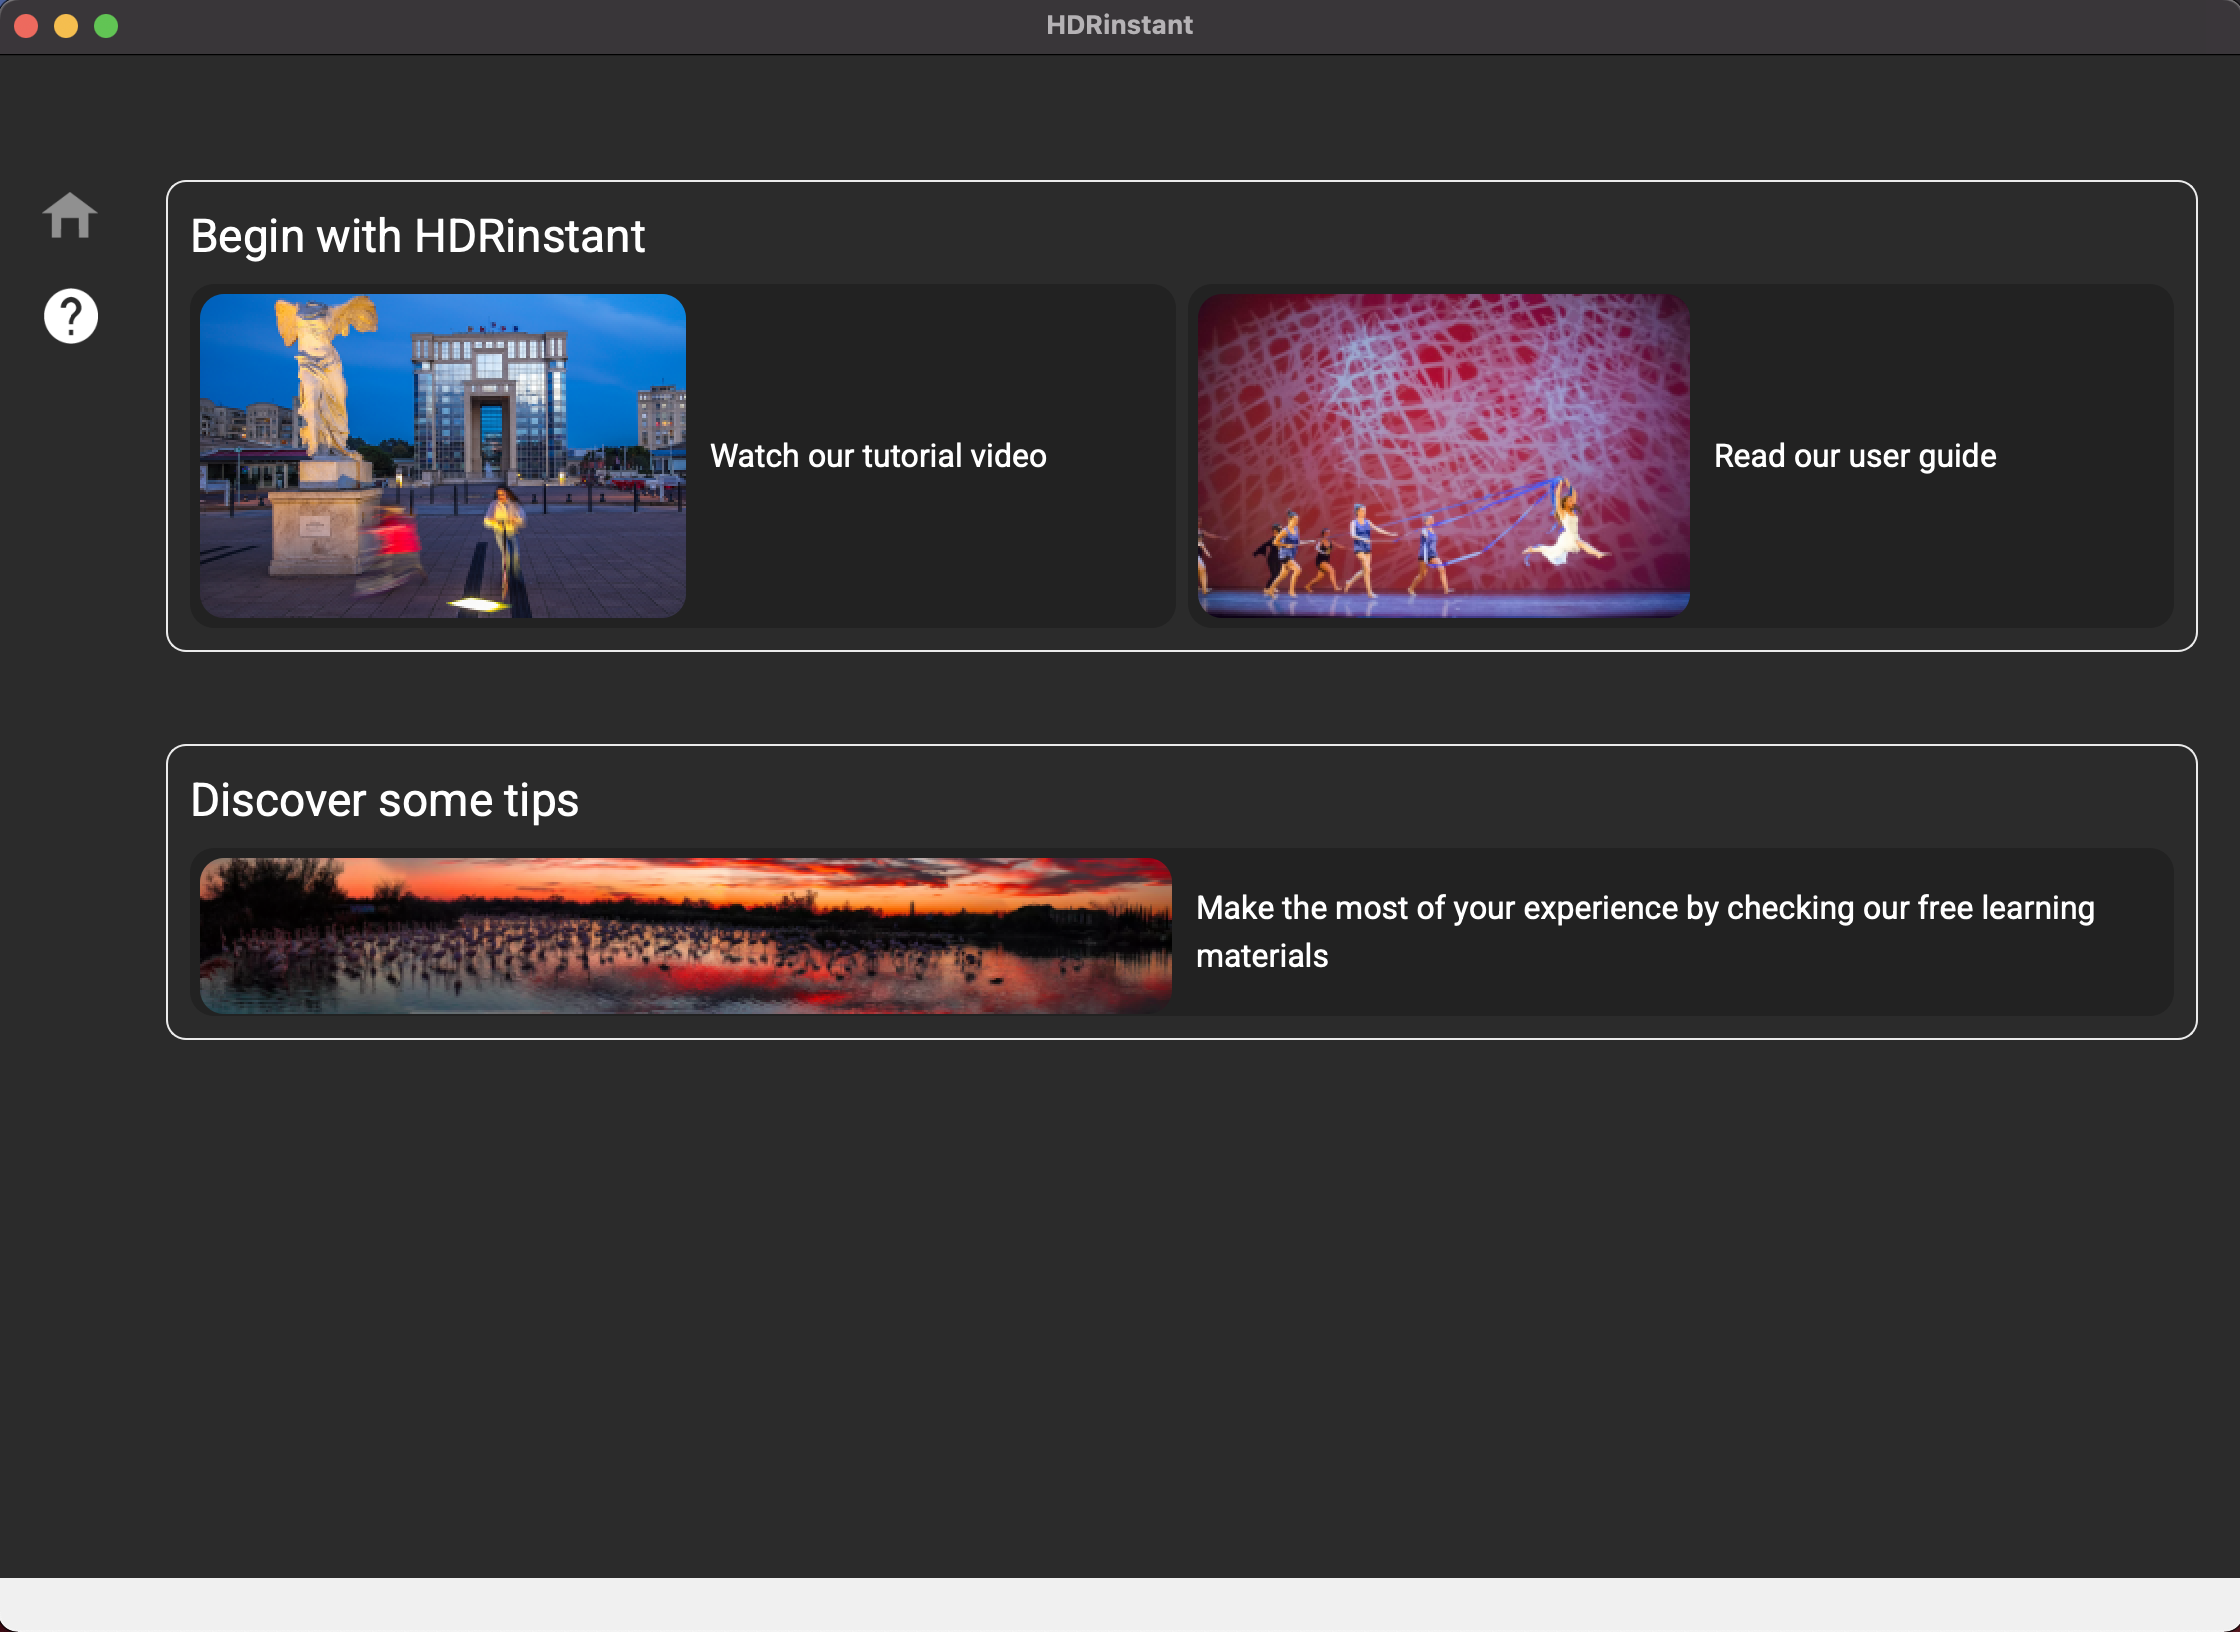
- Next time you will use the software, a new homepage will be displayed. You will be able to access the learning materials from the Help tab.
III. Select the frame you want to process
Once you have uploaded your video, the first step consists in selecting the frame you want to extract and enhance with HDR.
1. Adjust the speed and brightness of the video. Double-click on Brightness to reset it.

2. Select the best decisive moment with the help of markers, zoom and sharpness tools
- To help you select that best moment, you can mark up to four different frames. Pause the video on a frame that you think could be a good candidate, click on a marker and it will appear on the playback bar. To view marked frames again, just click on their respective marker on top of the payback bar. Right-click to delete a marker.
- If you want to zoom in on an area of the image, select this area, right-click and click on Zoom in. You can pan the area you zoomed in by moving your mouse while holding down the right button.
- To get the sharpest image, you can use the sharpness checker. This tool suggests sharper frames from the neighboring frames of the one initially selected:
- If you want the sharpness search to be carried out by considering your entire image, right-click on the image and select Search sharper frames – Full.
- If you want the search for sharpness to be carried out on a particular area of the image, select that area, right-click on the image and select Search sharper frames – Zone.

IV. Define the settings to process your image in HDR
Once you have chosen your frame, the second step is to define the processing parameters, from the HDR Enhancement section.

- Choose the processing speed from the drop-down menu.
The processing speed is the computing time required to process your HDR image. We recommend trying Fast first: some pixels blocks may appear where there is movement. If it is not satisfying enough for you, then try Medium: it is a good compromise between speed and quality. Slow makes the quality even better, but the calculation time will be longer, especially if the image contains a lot of pixels.
- The default processing is done in CPU. If your machine has a GPU, we recommend using it as the processing will be more efficient.
- To do so:
- Open the Settings
- Go onto the Hardware tab:
- Check the box Use graphics processor.
- Select the GPU of your choice from the drop-down menu. When possible, we recommend non-Intel graphics processors to get a faster processing time.
- Note that if you have selected a GPU, you won’t have to select the processing speed.

2. Define the number of images to stack in the Stacking window section.
HDRinstant technology uses a high-end technique of image stacking in order to improve image quality and reduce noise. We recommend trying with the default setting first. If the final result still contains noise, you can increase the number of neighboring frames before and after your selected image. However, make sure that the number of FPS is high enough for the neighboring frames have to be similar to your initial selected image. Also note that the higher the number of stacked images, the longer the processing time will be.
3. Select the anti-ghosting option in the Effect to apply on moving subject section.
This tool allows to increase or reduce blurs from moving subjects. When selecting High antighosting, your moving subjects will be sharp. A long exposure simulation will allow you to get an aesthetically blurred on your moving subjects.
4. If needs be, increase the Movement amplitude
If the movement of your scene is very fast and/or of great amplitude, some artifacts might appear on your final result. If so, you can process your image again using a higher Movement amplitude. You can change this parameter from the Settings:
- Go over to the Stacking tab and increase the Movement amplitude
5. Click on Process.
6. You are asked if you want to save those processing setting. By clicking on Yes, they will become your by-default settings.
7. Once processing is complete, we recommend you saving your final HDR. You can save it in various formats.
V. Edit your processed HDR image
This new window is dedicated to editing your HDR image.
The image displayed in the center is your HDR-processed image, to which HDRinstant applies a default tone-mapping preset: Initial.

1. You have two options for editing your image:
- Tone-mapping:
- Select a tone-mapping from the drop-down menu.
- Make your own tone processing and sharpness adjustments.
- Click Reset to return to the original tone-mapping settings.
- Presets:
- Presets are designed from the tone-mapping to give a certain look to your photo (Photographic, Natural…)
- Click on a preset to select it. Under the Image Edition tab, the tone-mapping from which this preset was designed as well as its tone processing and sharpening settings will be displayed.
- If necessary, adjust the tone-processing and sharpness using the sliders.
- Click on the preset to return to its original settings.
2. You will find in the Library tab:
- Your video.
- The reference image, before HDR processing (_REF).
- The image after HDR processing, highlighted in red (_HDR).
- The image after HDR processing and tone-mapped (_HDR_TM).

3. You can compare two of these images by doing so:
- Select two images by holding down the CTRL or cmd key.
- Click on one of the two icons at the bottom left of the screen.
- You can either compare two images by having them side by side (1st icon) or by using a slider (2ndicon).

- If you want to zoom into the image, select a zone, right-click and select Zoom in. You can pan the area you zoomed in by moving your mouse while holding down the right button.
- To replace an image by another one, simply click on the respective button, at the bottom of the screen, where the name of that image is displayed. You will be redirected to the Library to select your new image.
- You can compare your final result to the reference image, not processed in HDR, using the same tone-mapping settings:
- From the library, right-click on the original frame, not processed with HDRinstant, and select Apply the same tone-mapping as the HDR_TM image.
- A new thumbnail has been created, marked “_REF_TM”. This new thumbnail is the reference frame, not processed in HDR, and tone-mapped. You can select it to compare it with your final result.

- You can also directly click on the Comparison tab and select how you want to compare your images. Please note that, by default, the comparison tab will display your initial selected frame not processed with HDRinstant (“_REF”) versus your selected frame processed with HDRinstant and tone-mapped (“_HDR_TM”).
VI. Export your image
To export your image:
- From the menu, click on File and Export.
- Right-click on the image and select Save current image.
- From the Library tab, right-click on the image and select Export.
- Or click on the Export button.